 how-to
Postpartum Core Strength Exercises: A Step-by-Step Guide
Table of Contents
- How to Tell Your Core Is Ready for Postpartum Core Strength Exercises
- Postpartum Core Exercise Progression: From Breathing to Load
- Postpartum Core Workout at Home: 6 Beginner-Friendly Moves
- C-Section Core Exercises: Protecting Your Incision While You Rebuild
- Diastasis Recti Exercises: What Helps and What to Avoid
- Symptom-Based Stop and Modify Rules for Postpartum Core Work
- Sample Weekly Plan and Everyday Lifting Mechanics
- Conclusion: Building Postpartum Core Strength at Your Pace
- Frequently Asked Questions
Last Updated: October 13, 2026
How to Tell Your Core Is Ready for Postpartum Core Strength Exercises
Your core is ready for postpartum core strength exercises when you can breathe deeply, move without pain, and control your pelvic floor, not when a calendar says so. Most guidance ties recovery to a fixed number of weeks. Your body gives you better signals than any timeline, and this guide from XTREME Advantage Personal Training & More shows you how to read them.
Postpartum core strength is the process of rebuilding the deep abdominal and pelvic floor muscles that support your spine and organs after pregnancy. Pregnancy stretches the abdominal wall and puts pressure on the pelvic floor for months. A slow, staged rebuild works better than jumping back into old workouts.
Before you start, check for these green lights:
- Medical clearance from your provider, especially after a C-section
- No sharp pain, heaviness, or leaking during daily movement
- You can breathe into your belly without your ribs flaring
- A gentle pelvic floor squeeze you can feel and release
Red lights mean wait and ask your provider: pain that worsens, heavy pelvic pressure, or bleeding that returns after activity.
Postpartum Core Exercise Progression: From Breathing to Load
Progress through three phases, and move to the next one only when the current phase feels easy and symptom-free. This staged approach, which we use with clients at XTREME Advantage Personal Training & More, builds control before strength.
Phase | Focus | Key Moves | Move On When |
|---|---|---|---|
1: Connection and Breath | Wake up the deep core | 360-degree breathing, gentle pelvic floor squeezes | You can breathe and brace without doming |
2: Stability and Control | Hold a neutral spine under light load | Heel slides, glute bridge, bird dog | You finish 2 sets with no pain or leaking |
3: Strength and Daily Load | Add load and real-life movement | Dead bug, side plank, lifting mechanics | Daily tasks feel strong and controlled |
Phase 1: Connection and Breath
This phase is about finding the muscles again. Lie on your back with knees bent. Breathe into your ribs and belly, then exhale slowly. On each exhale, gently draw the pelvic floor up and in. Do 5 slow breaths, twice a day.
Phase 2: Stability and Control
Now you hold a neutral spine while your limbs move. Add heel slides and glute bridges. Keep your ribs stacked over your hips. If your belly domes down the middle, you are pushing too hard. Scale back and breathe.
Phase 3: Strength and Daily Load
This is where you rebuild real strength. Add dead bugs, side planks from your knees, and practice lifting with good mechanics. This phase carries you back to carrying kids, groceries, and strollers.
Postpartum Core Workout at Home: 6 Beginner-Friendly Moves
This postpartum core workout at home needs no gym, just a mat and 10 to 15 minutes. Do 2 sets of 8 to 10 slow repetitions for each move. Stop if you feel pain, pressure, or leaking.
Move 1: 360-Degree Breathing
Lie on your back, hands on your ribs. Inhale to expand your ribs in all directions. Exhale slowly and feel your deep core engage. This is your warm-up for every session.
Move 2: Heel Slides
Keep your spine neutral. Slide one heel out until the leg is straight, then draw it back. Keep your pelvis still. Switch sides.
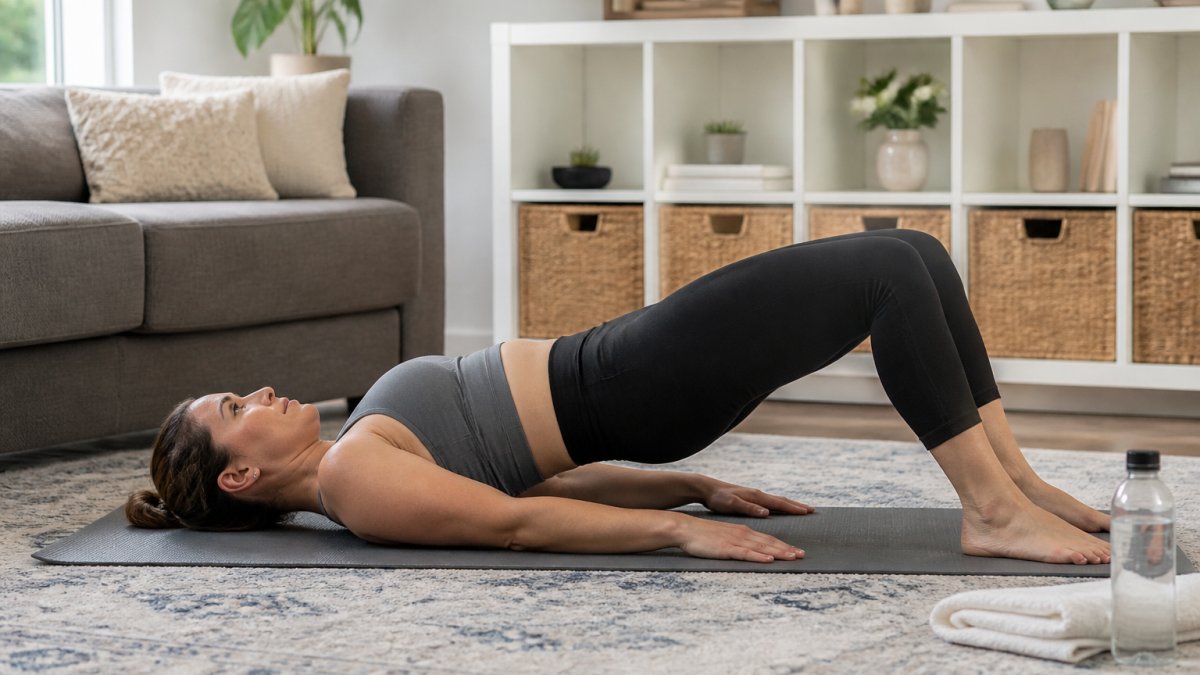
Move 3: Glute Bridge
Press through your feet and lift your hips. Squeeze your glutes at the top, then lower slowly. Keep your ribs down.
Move 4: Bird Dog
On hands and knees, reach one arm and the opposite leg out. Keep your hips level. Return and switch.
Move 5: Dead Bug
On your back, arms up and knees at 90 degrees. Lower one arm and the opposite leg, then return. Keep your low back pressed down.
Move 6: Side Plank from Knees
Lie on your side, prop on your forearm, and lift your hips from your knees. Hold for 10 to 20 seconds per side. Keep a straight line from head to knee.
C-Section Core Exercises: Protecting Your Incision While You Rebuild
C-section core exercises start with breathing and gentle walking, not crunches.
Wait for your provider's clearance before adding any core work.
Add movement in this order, and hold each step for several days before advancing:
- Breathing and pelvic floor squeezes while lying down or reclined. Start with 5 slow breaths, twice a day.
- Short walks, beginning with 5 to 10 minutes on flat ground and adding a few minutes every few days.
- Heel slides to wake up the deep core without pulling on the incision.
- Glute bridges once lying moves feel fine and you can brace without a pulling sensation at the scar.
- Bird dog and dead bug for control, keeping reps low and tempo slow.
- Side plank and light load much later, only after daily tasks feel strong and controlled. (Source: research on the prevalence of diastasis recti)
Support and bracing. Support your incision with a hand or a small pillow when you cough, laugh, or sneeze. Exhale as you brace rather than holding your breath.
Regression criteria. If you feel pulling, burning, or sharp pain at the scar, drop back one step in the sequence and stay there for a few more days.
What to avoid early on. Crunches, sit-ups, front planks, heavy lifting, and any move that makes your belly cone or dome. Also avoid straining on the toilet; a stool softener or a footstool that raises your knees can reduce the pressure that pulls on the incision.
Diastasis Recti Exercises: What Helps and What to Avoid
Diastasis recti exercises focus on deep core activation and breath, not on forcing the gap closed. Diastasis recti is a separation of the abdominal muscles along the midline, common after pregnancy. It often narrows over time with the right work.
What helps:
- 360-degree breathing and pelvic floor squeezes
- Heel slides, glute bridges, and bird dog
- Slow, controlled movement with a neutral spine
- Watching for doming and scaling back when it appears
What to avoid early on:
- Crunches, sit-ups, and front planks
- Heavy lifting and straining
- Any move that makes your belly cone or dome
- Holding your breath to power through
Symptom-Based Stop and Modify Rules for Postpartum Core Work
Let symptoms, not the clock, guide your sessions. This is the part most guides skip, and it matters more than any exercise list.
Symptom | What to Do | Why |
|---|---|---|
Abdominal doming | Reduce range or reps, breathe out on effort | The deep core is not ready for that load |
Pelvic pressure or heaviness | Stop, rest, and see your provider if it persists | May signal the pelvic floor needs support |
Leaking | Scale back and slow down | A sign the load is too high right now |
Pain | Stop the move entirely | Pain is a signal, not a hurdle |
Modify before you quit. Fewer reps, smaller range, and slower tempo keep you moving without pushing too far.
Sample Weekly Plan and Everyday Lifting Mechanics
Run this plan for two to three weeks before adding load.
Week at a glance
- Monday: Phase 1 breathing plus heel slides, 10 minutes
- Tuesday: Gentle walk, 15 to 20 minutes
- Wednesday: Glute bridges and bird dog, 2 sets each
- Thursday: Rest or breathing only
- Friday: Full six-move circuit, 1 set each
- Saturday: Gentle walk plus breathing
- Sunday: Rest
How to progress. Add load or reps only when the current week feels easy and symptom-free for two sessions in a row.
Frequency and duration. Two to three short sessions per week is enough in the early weeks. Ten to fifteen minutes per session beats one long session you dread.
Everyday lifting mechanics. The same rules you use in workouts apply to feeding, carrying, and household tasks:
- Squat down with your feet apart instead of bending at the waist
- Breathe out as you lift, and keep your ribs stacked over your hips
- Hold the load close to your body, whether it is a baby, a car seat, or a grocery bag
- Split the load into two trips instead of one heavy lift
- Roll to your side to get out of bed, then push up with your arms
- Set up feeding positions so your feet are supported and your low back is not rounded for long stretches
- Carry the car seat with two hands when you can, and switch sides to avoid loading one hip repeatedly
When to change the plan. If daily tasks feel strong and controlled for a full week, move to the next phase. If they feel shaky, stay where you are. The plan is a template, not a deadline.
Conclusion: Building Postpartum Core Strength at Your Pace
Rebuilding your core after pregnancy takes patience, and the payoff is a body that feels strong and steady again. At XTREME Advantage Personal Training & More, we build customized programs for postpartum women, with one-on-one attention, small group training capped at three clients, and live virtual sessions when leaving the house is not realistic. Our trainers watch your form closely and adjust every move to your symptoms, so you progress safely instead of guessing.
Frequently Asked Questions
When can I start postpartum core exercises?
There is no single timeline that fits everyone. Many providers suggest waiting until you have medical clearance, often around your six-week postpartum visit, but your readiness depends on how you feel, whether you had a vaginal or C-section birth, and whether you have symptoms like pain, leaking, or pelvic pressure. Start with breathing and gentle activation, then progress only when those feel easy. If you are unsure, ask your OB or a physical therapist before adding load.
Can I do ab exercises if I have diastasis recti?
Yes, but choose the right ones. Deep core work like breathing, heel slides, and dead bugs is usually safer than crunches, sit-ups, or front planks, which can increase abdominal doming and put more pressure on the midline. Focus on core activation and breath coordination rather than how many repetitions you can do. If you see a visible ridge or dome along your midline during an exercise, that is a sign to regress the movement or stop and check with a professional.
How can I tell if a postpartum core exercise is too difficult?
Watch for signs during and after the movement: abdominal doming, pelvic pressure, leaking, pain, or a feeling that you cannot control your breath. If any of those appear, the exercise is too hard for where you are right now. Regress to an easier version, reduce your repetitions or hold time, or take a rest day. Progress gradually, and if symptoms continue, see a physical therapist who works with postpartum clients.
How often should I do postpartum core exercises?
Aim for three to four short sessions per week, about 10 to 15 minutes each, rather than one long workout. Consistency matters more than duration in the early weeks. Pair your core work with walking and daily movement, and give yourself at least one full rest day. As your core stability improves, you can add a set or a repetition, but only if you stay symptom-free. Stop and modify if anything feels off.